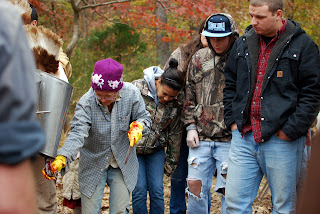
We did a complete practice run for thanksgiving last week. Not a "dry" run, but a juicy one, a real deal.
Step 1. Catch Turkey. While diving for them and grabbing their feet is satisfying, a hook is more effective with 25 of them. Transport them to processing site the night before to keep them from being overly agitated and stressed.
Step 2. Kill Turkey. There's a vein on both sides of the neck. Put
them through the killing cones (or buckets with a hole at the bottom)
and cut those veins. Do not make eye contact at this point. You don't
want to cut the breathing tube because then they sort of gurgle to death
and suffocate. I'm sure the cut doesn't feel great, but bleeding out
makes them just slowly go to sleep as the heart pumps the blood out.
Catch the blood in a pile of leaves and compost later.
Step 3. Scald the turkey at 150 degrees. Dunk and swirl. Dunk and
swirl. Make sure all feathers get under the water. After roughly 30
seconds of this, test a wing feather - if it comes out relatively easy,
its ready. If it doesn't, dunk again, but don't do it too much or at
too long of intervals, because it cooks the skin. Not enough dunking
and the feathers don't come out. At this point you realize that
scratching your nose with your hand is not going to happen (blood,
feathers, etc. coat the hand). Its ok, use forearm of tree trunk.
Spouses can help too, if they're not plucking or taking pictures.
Step 4. Pluck. This can be done in a commercial plucker, which is
like a spinning washing machine with rubber fingers all pointing in.
Turkeys are a little big for it, so there's a lot more handwork.
Step 5. Cut the feet off, place in feet bucket. Make into broth later for soups and winter-warm-ups.
Step
6. Cut/twist head off, place in head bucket. Dogs like the heads, but
its best to limit them to 3 heads each or they'll spoil - the dogs not
the heads.
Step 7. Get guts gone. You cut the skin between their vent and ribs
to make a hole for your hand (its still warm at this point which is very
nice when its cold out). Reach your hand inside and sort of spoon
around the edge of the cavity and separate all parts from the cavity.
Its a bit flimsy, so if you can get aholt ("a hold") of the gizzard, its
a good solid and connected part that can help pull the rest out. Don't
break things, it can get nasty if you do. If you find an egg inside,
hold it up and say "wow, that's so cool!"
Step 8. Do a final cleaning of the whole thing. Cut another slit
above the one for gutting to make a sort of strap to tuck the legs in.
Tuck legs in.
Step 9. Place on ice.
Step 10 option a. Freeze.
Step 10 option b. Cook and eat.
Step 11. Lean back as a satisfied man. Don't shave for a month in honor of the turkey.
Step 12. Write blog post to round out steps to 12. 12 steps to turkey delight.


WoW. Thats so much more than I ever wanted to know. wow...
ReplyDeleteLooks delicious! Katie, will u come to Nashville and cook my turkey :)
ReplyDeleteSome thoughts:
ReplyDeleteI'm glad its composted, but I still feel like the blood is going to waste. Especially when Black Pudding is so delicious (and so Christmasy) http://www.bbc.co.uk/food/black_pudding
When I slaughtered and butchered chickens I had the hardest time separating the gall bladder from the liver. Any suggestions without cutting off too much liver but also not getting gall all over the delicious innards?
And most importantly "vent", pshaw, I was hoping for a chance to read an in context use of the word "cloaca".